Friday, January 27, 2012

City Tote Mistake ahem Opportunity For Improvement


 I dug in to my Far Far Away III stash again and wanted to make this City Tote from Keyka Lou Patterns. 


I thought I had double-checked and TRIPLE-checked my cutting, but sure enough, these poor little clothes on the line were cut hanging wrong side up! Bummer! Well, luckily, I found out before I began assembling, so I re-used these front pieces later to make a Business Card Wallet instead.


Here's the front of the tote, with little clothes hanging down properly, using the pink colorway instead of the green.


I used the child playing with horses for the inside fabric and interlined it with batting. Is this a boys or girls? I cannot tell. That's cool.


The important thing is that I had enough fabric to get the wee little owl flying with undies centered on the outside. Adorable!


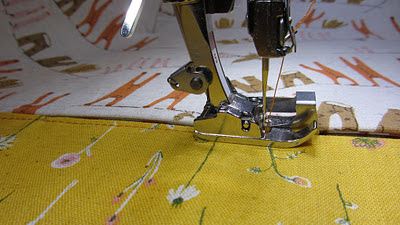
I edge-stitched the top fronts of the bag. I should have edge-stitched the side pocket and inside pocket, too.


Can you tell I love my edge-stitch foot?


Here's the Business Card Wallet I made with green colorway that had been cut upside down for the tote:


I must have had a really bad day, because this poor little snap flap is not even centered. I didn't measure correctly. Oh, well. It does hold my important papers.


If I make the tote again, I will definitely use stiffer interfacing than just Pellon 911. Maybe 931 or 950.


Have you made these or similar items? What did you do?

Terrain Quilt Finally Done?! If you say so!

I finally finished quilting the Stepping Stones project sheet pattern using a layer cake of Kate Spain's Terrain fabric.

I say it's finished, because I went ahead and finished the binding, but I am not sure if I should do some more quilting or not? What do you think?


I was in a hurry to bind it, because the extra batting around the edges was shedding like crazy all over the place. I didn't have enough clips or pins to roll the backing over the batting temporarily, so I broke down and used masking tape. How embarrassing!! Ugh. Well, blue painter's tape and lint rollers are my new best friends!


I read that stitching in the ditch is "so '90s" so I stitched a 1/4 inch in from all the black seams, with black thread in the top and bobbin.


Then, I gave in and stitched in the ditch with monofilament in the top and black thread in the bobbin, around the squares on point.

I really want the color to pop, but I don't want it to be too loose. Using Warm and Natural batting, I think it's ok, structurally.


If I do more quilting, it would probably be quite a commitment to do it overall, and it might get heavy.


Would you quilt in the colored blocks at all?


This is a late holiday gift, so I'm hoping to send it on its way soon!


I mitered the corners, but I didn't stitch all the way out to the edges, so they have little mouths. I think I should hand stitch those shut. Any suggestions?


I still need to wash it. I hope it works ok. I did prewash all the black once before.


I had a little bit of trouble with lots of whiskers of batting coming out where I had thread basted. In a more recent video by Sharon Schamber, I think she mentions using 2 strands of DMC Perle Cotton Size #8.


I think I used a round ball of thread, Size 5 on this, so I'm going to try next time with Size 8. Either way, I am singing her praises! I am very pleased at how little of a struggle it was, with no puckers or tucks on the back!


Please share your suggestions on how to improve this! Thanks!

Monday, January 23, 2012

Thread Basting a Quilt for the First Time

I've only made a few quilts before, and they were all wall hanging sized, more than 6 years ago. I fell in love with this Stepping Stones project sheet and just had to make it! I finally got the Kona black backing yardage delivered after I had finished the quilt top, and I was ready to baste this little puzzle.


I had never made anything this large, and I was trying to figure out where I would spread it out to pin baste it. I would need to buy basting pins and a Kwik Klip if I decided to do that.

It's still less than 60 inches square, but with apartment living and 2 dogs, it can be a daunting task on the floor.

I stumbled upon Sharon Schamber's You Tube videos and pondered the possibility of using her technique of hand basting (even if machine quilting) with wooden boards on a table, used as the frame. What a revelation!


I wasn't sure it would work for machine quilting (let alone without a longarm), but just look at her stunning quilts!


I realized quickly that she would not steer me astray, even though I am a newbie.

And then, I just happened to read that Mel Brooks of Milly Bee Quilting, in New Zealand, used this method on her lovely quilt, too: Meet Gaia! Wow! This gave me a new resolve!

So I bought a thimble, size 8 DMC white perle cotton, and 2 painted baseboards at Home Depot. I had them shortened to 8 feet, just long enough for this table that I could set up when needed. I followed Sharon's instructions, watching the videos several times.


After the first column of basting, I realized that being left-handed, I should have started on the left side, and not the right, to avoid wasting thread when crossing over between columns. Doh! I'm a slooooow learner.


I was still worried sick that my backing was not tight enough and I would end up with lots of tucks and pleats, but I just stuck with it...


I took a break for dinner and then returned to finish it. Whew!

Circle Zip Earbud Pouch from Erin Erickson's Tutorial

I got some zippers from Zipit on Etsy. They have great deals on lots of zippers that can be used for pouches, purses, pants and skirts in fun colors. Normally, I stick with all things black, but I'm trying to get out of my comfort zone.


With still more scraps of Far Far Way III fabric remaining in my fat quarter bundle, I made this delightful Circle Zip Earbud Pouch from Erin Erickson's tutorial. 


Her pattern is a free pdf download on the tutorial page, and the instructions with color pictures were so easy to follow.

This was so much fun, I went ahead and ordered a bundle of zippers from zipit on etsy, from the suggestion of many other bloggers.


This was so rewarding for such little struggle under the presser foot!
And now my headphones won't get all knotted up in the bottom of my purse!


I still need to get a ring around the fabric tab...
I'm going to make more as soon as I get some fabric to match all these colorful zippers!

Have you made any of these?

Thursday, January 12, 2012

Box Wallet from Keyka Lou Pattern

I ordered the backing fabric for my Terrain quilt top. I decided to go with Kona black solid for the backing. Thanks, Erin, for the suggestion!

While waiting for backing to arrive in the mail, I decided to make a few more items from Keyka Lou Patterns. I snagged a few patterns on sale right before Michelle retired them, and they are so cute! Of course, I'm behind the fashion curve, but I have a lot of catching up to do, so hopefully, this won't be too boring.

Still swooning over my Far Far Away III fat quarters, I decided to use some scraps for a small box wallet to match the Cross-Body Bag.

 I used batting in the flap and plain muslin for the interlining.


I found the 14mm magnetic snaps and decided to try them here. 


 With just a hint of pink in some of these fabrics, I used pink thread in the bobbin and orange in the top.


I've got a free arm machine, but the area to stitch the wallet closed was so small, I just followed the instructions to stitch on the flatbed. This tended to get caught up in the needle threader / dual feed / walking foot area, if you have any of those on your machine. Turning the wallet right-side out seemed like a feat for Houdini. Yikes! I didn't even slipstitch it closed, I just topstitched it shut.


I thought I marked it well - where to put the matching snap - but I put the body snap too far down, and now the wallet will not lie flat.
Next time, I'd move the snap up a little. It does fit a small packet of tissues, but barely.
Thankfully, I'm not selling any of these items. It's an exercise in creativity + patience - stubborn curiosity.
Whatever I don't use myself will be given away or put on the Shelf of Shame.
If you missed out on getting this pattern, be sure to check Michelle's etsy for items made with this pattern plus other patterns available.
They are delightful!